Showing posts with label corn free. Show all posts

Wednesday, December 1, 2021

Confectioners/Powdered Sugar without the cornstarch


Confectioner sugar is basically fine ground sugar and cornstarch blended together.

They do sell a corn free option or you can blend your own in a blender. 
Sugar and arrowroot, tapioca .... 

1 cup sugar (I prefer unbleached but it will give you a hint of beige)

1 tablespoon of tapioca or arrowroot starch (HW- you can actually skip this and just sugar, but this does help to keep it from clumping up when stored. 

Blend until a fine powder is formed. 


* I use a regular mouth size mason jar on my blender- screw on blade and flip upside down- similar to a "bullet blender".   

I have seen people on the net use 1/4 pints, 1/2 pints, pint and quart size jars.

I like to use the 1/4 pints to store my blades. They screw on perfectly and keep the blade safely tucked away. 


Waffle Iron Cookies - oh my!


* gluten and corn free options. See notes. 

  • 1/2 cup butter, softened
  • 1 cup sugar
  • 2 large eggs, room temperature
  • 1 teaspoon vanilla extract

  • *1-1/2 cups all-purpose flour
  • 1 teaspoon baking powder
  • 1/2 teaspoon salt
  • *Confectioners' sugar
 Gluten Free Options: 
You can sub these gluten free options:

 #1 choice Cassava flour, which acts the most like all purpose flour, ratio of 1 cup to 1 cup 

 #2 Almond flour, ration is 1 cup almond to 1/2 cup all purpose flour (this recipe would take 3 cups almond flour) 


Corn free option:
Confectioner sugar is basically fine ground sugar and cornstarch blended together.
They do sell a corn free option or you can blend your own in a blender. 
Sugar and arrowroot, tapioca .... 

1 cup sugar (I prefer unbleached but it will give you a hint of beige)
1 tablespoon of tapioca or arrowroot starch
Blend until a fine powder is formed. 
* I use a regular size mason jar on my blender- screw on blade and flip upside down- similar to a "bullet blender".   

Directions

  1. In a large bowl, cream butter and sugar until light and fluffy, 5-7 minutes. Beat in eggs and vanilla. In another bowl, whisk flour, baking powder and salt; gradually beat into creamed mixture (mixture will be thick).
  2. Drop dough in batches by tablespoonfuls 3-4 in. apart onto a greased preheated waffle iron. Bake until dark brown, 2-3 minutes.
  3. Remove to wire racks to cool completely. Sprinkle with confectioners' sugar.

Monday, November 15, 2021

No CORN - Southern Cornbread & Dressing (Keto Style)


Video for cornbread:  it will open in a new page. 


KETO CORNBREAD RECIPE : double the recipe below if needed to accommodate more guests.

Preheat oven to 350 ( PUT YOUR CAST IRON SKILLET IN THE OVEN AS WELL – getting the skillet hot before greasing and pouring the batter in. This helps make a lovely crust on the cornbread. See cornbread video for visual on greasing the pan LIBERALLY )

DRESSING // CORNBREAD RECIPE BELOW using a 10 inch cast iron skillet – Will serve around 4-6 people respectively ( you may double this recipe as well and it works fine )

The most essential ingredient is a cast iron skillet- this single recipe will fill a small , 6 inch, skillet. 

1/2 CUP pork panko
8 tsp coconut flour
4 tsp baking powder
4 tbsp almond flour (blanched)
4 eggs (room temperature)
4 oz cream cheese
4 oz butter


In a large bowl, Mix pork panko, almond flour, baking powder, and coconut flour together well.


In a separate bowl mix softened butter and cream cheese together until they form a creamy texture

Add room temperature eggs to the fatty cream mixture and mix well.
Then, add that to dry ingredients and mix well.

Grease your skillet well with a generous amount of bacon grease (not butter or anything else -bacon grease.  (see video) -(HW: you literally want your cornbread to be floating in bacon grease. Neisha says TRUST her. ) 

Pour cornbread mixture into hot skillet and place in preheated oven for 25 minutes, or until golden brown on top.

Allow to cool and then serve with your favorite keto soup or continue on to make dressing.

This pairs nicely with chili. Here is my favorite keto chili recipe by my good friend Melissa and her husband Jared.
https://cookingketowithfaith.wordpress.com/2018/09/12/chillin-with-chili/

Neisha recommends these products: 

Find all your ingredients here :
Cast iron skillet : https://amzn.to/2OMvlnr
Pork Panko : https://amzn.to/2RP7jK4
almond flour (blanched ) : https://amzn.to/2OL2uQ3
Coconut flour : https://amzn.to/2OJKnKh
Food scale : https://amzn.to/2TenUc0
Pioneer woman mixing bowls (similar ) : https://rstyle.me/+nix7p9Pll9HpSzZ8lBD11g


DRESSING // This will serve around 4-6 people ( you may double this recipe as well and it works fine )

After your cornbread has cooled, crumble it apart and place in a large bowl. Cover the bowl with a dishcloth and allow to sit overnight. (12 hours if possible ) If you don’t have time for this step you may break the cornbread apart and toast it in the oven on a baking sheet to dry it out a bit. (This won’t dry it out too much as long as you don’t let it scorch, so don’t worry ) Place cornbread in the oven on top rack, broil and watch carefully as it is very easy to burn if you aren’t paying attention.

Once the cornbread has sat out or been toasted, place in large bowl and add the ingredients below :

PREHEAT OVEN TO 350 – add the following ingredients into bowl of crumbled cornbread.

  • 1/2 cup chopped celery ( more or less as desired )
  • 1/2 cup chopped onion ( again more or less depending on your preference ) 

  • MIX UNTIL CORN BREAD IS WELL BROKEN UP AND THERE ARE NO CHUNKS.
  • add in 1 tsp to 1 1/2 tsp of dried sage – SAGE is a very strong spice and should be used with caution if you have never cooked with it. Start with 1 tsp if you are not one for strong flavor. Too much will ruin the dish. I enjoy the taste myself. MIX WELL so sage is evenly distributed.
  • ADD 1 cup to 1 1/2 cups of CHICKEN BONE BROTH ( store bought is fine but homemade is even better) eyeball this a bit and pour in a little at a time while stirring it into the mix. The texture should be good and wet but not soupy. This type of cornbread won’t soak up the broth like traditional cornbread would. When in doubt pour a little more in, it’s better to be too moist than too dry. No one likes dry dressing.
  • If you are wanting to add meat – I suggest using chicken thighs as the meat is fatty and delicious. Boil the thighs in salt water till the meat is falling off the bone, then chop it up. About a cup of chopped chicken thighs is what I would use ) add it in at this point and mix everything together making sure the cornbread is well broken up with no chunks.
  • Add black pepper (or omit)  to taste and mix.
  • I find that it isn’t necessary to add any salt to this dish as there is salt from the pork panko and the broth as well.
  • After mixing all of these up VERY well, I usually do a taste test just to see if I need more of something. Feel free to adapt this recipe to your personal preference.

After you have finished mixing your ingredients, grease a glass dish ( I would use a square casserole dish, Mine is a size: 9 1/2″ sq. x 2 1/2″ high; 10 3/4″ long) with butter or bacon grease and pour in mixture and place in oven for 30-45 minutes checking in on it at around the 30 minute mark. The top should turn a golden brown.

Allow to cool for around 30 minutes before serving.


Thursday, December 1, 2016

Homemade Ginger Ale

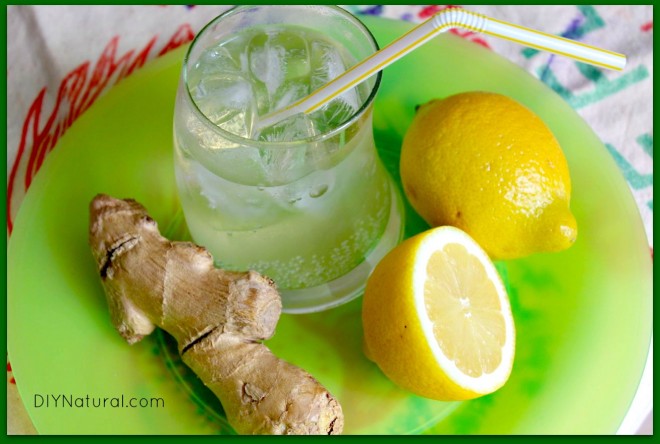
How to Make Ginger Ale 1You begin by making a ginger syrup, which can be stored in the refrigerator for a few weeks. Just add the syrup to chilled sparkling water or club soda when you’re thirsting for fresh ginger ale. It’s easy peasy, lemon squeezy!

Make ginger syrup

Juice lemons, reserving one thick slice from the middle. Add lemon juice, lemon slice, chopped ginger, sugar, and water to a pot. Stir to combine. Bring mixture to a boil, then decrease heat to a simmer. Simmer gently for 15 minutes. Using a strainer or cheesecloth to catch solids, pour liquid mixture into a large glass measuring cup. (Compost solids or save ginger for other uses.) Make note of the amount of liquid you have. Return liquid to pot and continue simmering for 20-25 minutes, or until liquid has been reduced by half. Allow syrup to cool and transfer to a glass jar with a lid. Refrigerate until ready to mix drinks.

Monday, October 31, 2016

Gut Healing Marshmallow Fluff


From corn allergy group- she said you can also use sugar. She made these for her children for October treats. Uses some cocoa powder mixed with oil for face.


Sunday, May 8, 2016

Fajita Grits (Corn Free)

Image result for cream of buckwheat nutrition

By Heartweed

Servings: main meal for 2 adults and a 4yr old ;)


1/2 cup Cream of buckwheat (taste just like our Southern corn grits!)
1 lb grass fed beef- ground or steak cut in strips
1 cup or more of bell pepper cut in strips or diced
1 small onion strips or diced
olive, coconut, macadamia or oil of your choice


Cook buckwheat according to package: I used Pocono Organic Cream of Buckwheat- for 2 servings bring 2 1/2 cups of water to boil add 1/2 tsp salt , stir in 1/2 cup of buckwheat , return to a boil and simmer for 10 minutes stirring frequently.

I like to use cast  iron skillet for the meat and veggies. Coat the bottom with a little oil and add onions. Cook until tender (I like mine caramelized/slightly browned) Add the peppers and beef and cook until the beef is cooked through.

Spoon the cooked buckwheat in a bowl , top with the beef and veggies. You can also add salsa. You can also cook the veggies separate from the beef and layer: buckwheat, beef, veggies for a pretty bowl.

Monday, February 15, 2016

Valentines Milk Shake

1 can of full fat organic coconut milk (Native Forest)
6 or so organic frozen strawberries
sweetener of choice - maple, beet sugar, honey (adjust to your taste -maybe about a tablespoon) optional

Blend and add water to thin. 

Saturday, February 13, 2016

Better Peanut Butter Cups

I do not know the source but it came from Facebook Corn Allergy& Intolerance group.

1/2 cup coconut oil
1/2 cup nut butter
1/4 cup honey

melt together on stove top

add  1/4 cup of cocoa

pour into lined muffin tin and freeze till firm

You can add coconut to bottom of liners or chopped nuts for a "crunchy layer"

Thursday, February 11, 2016

Marshmallows: Rustic Homemade Marshmallows Corn/Egg/Refined Sugar Free


http://theurbanposer.com/rustic-homemade-marshmallows-whoney/

Rustic Homemade Marshmallows W/Honey

(Gluten/Corn/Egg/Diary Free)
Check out the instructional video at the bottom of the post

Ingredients:
1 cup filtered water (split into half cups)
2 1/2 U.S. tablespoons powdered gelatin. 225 bloom strength, same as Knox gelatin. ( I use Great Lakes brand (grass beef gelatin)
1 1/4 cup organic light colored honey or maple syrup (or half of each)
1 teaspoon vanilla extract
1/4 teaspoon salt
Optional: Arrowroot starch or tapioca starch (in place of the traditional powdered sugar) to coat the outsides of the marshmallows. You can also use organic powdered sugar or other coatings such as cocoa, coconut and cinnamon.
Method:
1. Grease an 8×8 pan (or even a rectangular casserole dish) and line with parchment paper. Leave some length to create flaps over the sides of the pan. They will be used as handles for removing your finished marshmallows later. Sprinkle the parchment paper with a light layer of arrowroot starch or other coating of choice.
2. In your mixer bowl, sprinkle the gelatin evenly over 1/2 cup of water. Allow to bloom (hydrate) for about 5 minutes.
3. While the gelatin is blooming, pour the other 1/2 cup of water in a sauce pan, along with the honey/maple syrup and the salt. Turn the burner on at a medium to medium high heat. Bring the mixture to a boil (watch it though as it likes to really foam up). Place a candy thermometer in the sauce pan and continue to boil the mixture until it reaches 240-242 degrees (the soft ball stage) or a drop of the syrup dropped into ice water forms a pliable ball. This usually takes 12-15 minutes (give or take) depending on how hot the burner is, size of pot and even the humidity in the air.
4. Turn the stand mixer or hand beaters on to medium. Pour the syrup mixture into the bowl in a steady stream, combining it with the softened gelatin. Avoid pouring it directly onto the beaters, or the syrup will splatter and hit you or harden in the sides of the bowl.
5. Turn the mixer up to high and continue beating until it triples in volume, becomes light in color and the marshmallow cream is just cool to the touch (this can be anywhere from 5-10 minutes depending on your mixer). Times will vary! Add the vanilla toward the end of mixing, just before you think it’s ready. If adding spices, now is the times to add those as well. When the marshmallow cream is sufficiently whipped, it will have good volume and hold its shape for a moment before falling back on itself when scooped up with the beaters.
6. Turn off the mixer and using a rubber spatula, transfer the marshmallow creme to the prepared pan. Working quickly, smooth out the top with a pallet knife or back of a spoon. Sprinkle starch evenly over the top and pat down if needed.
TIP: If you are not using a coating then lightly grease your hands with oil and pat smooth. This will help keep the marshmallow cream from sticking to your fingers. Allow to sit and “cure”anywhere from 4-6 hours. Although I have been known to cut them earlier and they are often ready. But, if you want them to look nice and clean after cutting, I do recommend waiting at least 4 hours, even if they seem set, as they will be more wet inside.
7. When set, remove the marshmallows by lifting from the parchment paper flaps. Carefully peel away from the sides, dusting with starch if needed. Cut to desired size and shapes. Add more coating while cutting if needed and toss them again in some starch once cut for a super nice finish.
Enjoy! (Ingredients and cooking times may vary slightly in this video but the process is essentially same)

Homemade marshmallows can be an intimidating feat! If you’ve ever tried them and failed as I have, you can bet it is probably not the recipe that is presenting the problem. In a perfect world marshmallows should be light, airy and fluffy! But all too often, after all our efforts we are left with either a sticky mess that never sets up or a dense spongy, chewy block that sets too quickly.
Don’t let these issues put you off homemade marshmallows for life!
With a little preparation and practice they can be very rewarding and even….”maybe” a little healthier than the corn syrup laden ones you can buy at the store. This recipe has half the sugar of the average marshmallow and can be made with honey or maple syrup. The honey brings a lovely and unique flavor while the maple syrup makes a more neutral tasting and lovely marshmallow. Some marshmallows contain egg whites while others do not. This egg free version is perfect for those with egg allergies or for those who just want a simpler recipe. Both are delightful though.
So in order to help you along your marshmallow journey….here is a compiled list of things that I have had to troubleshoot over the years. Preparation is the best way to set yourself up for success! Once you get the process down, get cozy with your thermometer and a feel for your mixer, you will enjoy these lovely treats for a long time to come.

First order of business…. thermometers:

1. Be sure to test your thermometer for accuracy. Thermometers can easily get off by getting bumped, dropped or just with regular use. Some can be calibrated, some can not. This is the case with both regular and digital thermometers.
2. Most thermometers have an optimal “fill” line, telling how much liquid you need for them to read most optimally. If your pot is too large, you may not get an actuate reading. Most often this reading is off in the direction of displaying a cooler temperature than there actually is. Conversely letting the actual bulb part of thermometer touch the bottom or sides of the pan cam also result in inaccurate readings, usually showing the syrup as hotter than it actually is. If needed, you can carefully tilt the pan for a moment so the thermometer tip is fully submerged. This can help you get a better reading.

Trouble Shooting:

1. Soft or Soggy, lacks volume
If the marshmallows are too soft, soggy, wet or lack volume after setting for 4 hours or so,  your sugar syrup may not have gotten hot enough OR you did not whip them long enough. Whipping times will vary quite a bit depending on your mixer. However you can not whip an undercooked sugar syrup enough to make it fluffy. Also, a very wet, humid day can make it hard for marshmallows set.
2. Clumpy, Seized, Stiff, Un-spreadable, Lacks Volume
If the marshmallows set too fast or you can’t spread the cream without it clumping up, or if they are dense and lack volume….your sugar syrup may have been too hot, you added the sugar syrup too quickly or you just over beat it. First check to be sure that your thermometer is reading correctly. But remember, even if your thermometer is set correctly, thermometers can still give inconsistent readings if the ingredients don’t go up to the fill line.
3. Wet and Sticky Once Cooled
If the marshmallows are wet on the bottom or the on the top after setting the full four hours, then the cream was probably too warm when transferred to the pan. Also, your liquid measurements may have been off.  Try a little sprinkled starch to help reduce the stickiness. Again, humidity can be a issue here.
4. Gelatin Clumps in The Marshmallows
If there were gelatin clumps and hard bits in the marshmallows, then the gelatin was not fully dissolved by the sugar syrup. Be sure to let the syrup melt the gelatin in the early mixing process. If needed you can stop and stir the sugar syrup once the gelatin is added.
5. How to Check Your Thermometer For Accuracy
You can test your thermometer for accuracy by placing the tip in a pot of boiling water. If you are at sea level it should read 212 degrees F or 100 degrees C. I usually let it stand in the boiling for 5-10 minutes to give the thermometer time to catch up. Some are slower than others.

MOST IMPORTANTLY: Great candy making skills take time and practice. Just be patient and don’t expect perfection every-time. There is no such thing as a FAIL-PROOF candy recipe.
ROASTING: For best results I use a kitchen torch for roasting the marshmallows. If using over a fire, I like to let them dry out some once cut. Dusting with powdered sugar or arrowroot starch will give you the best results for roasting. Also, stick them in the hottest part of the fire, roasting for a shorter time than “Jet Puff” style marshmallows.
STORING: I don’t keep mine longer than 3-5 days in the fridge. They freeze very well though and can be kept longer. Just bring to room temp before using.


Tuesday, December 22, 2015

JALAPENO DAIRY-FREE CHEESE SAUCE


Dairy-free jalapeno cheese sauce

1 cup water
1 to 1.5 cups plain (not roasted or seasoned) cashews, depending on how thick you want it*
1/2 to 1 jalapeno pepper (2 to 4 teaspoons, minced), seeds removed (wear gloves to cut and handle the pepper)
2 tablespoons lime juice
1 teaspoon cumin
1/2 teaspoon chili powder
3/4 teaspoon sea salt
*When you add this sauce to pasta you need only 1 cup of cashews, because the pasta will release some of it’s starch, thickening the sauce. If you’re going to use the sauce as a dip or over an omelette then use more cashews.
  1. Puree all of the ingredients until completely smooth.
  2. Use right away or refrigerate for up to 1 week.

Monday, August 3, 2015

Corn Free Corn Dogs


From a member of a corn group I follow on facebook (Marty) 

1 C chickpea flour
1/2 tsp. guar gum
Pinch salt
1 1/2 tsp baking powder
2 T sugar
1 egg
1 T oil
Milk 
Mix dry ingredients, whisk in egg, oil & enough milk to make a nice pourable batter. I cut my hot dogs in half and put both halves in the little loaf pans. Grease the pans with a safe for you fat. Pour batter over dogs and bake at 400 degrees for 20 minutes. 

Saturday, August 1, 2015

DIY Instant Oatmeal packets


Author: 

Ingredients
  • 10 cups quick oats
  • 1 teaspoon salt
  • 1-1½ cups brown sugar (depending on how sweet you want it)
  • 1 cup powdered milk
  • 2 teaspoons cinnamon
  • 21-24 snack-size zip bags
Instructions
  1. Put 6 cups of the oats into a large bowl.
  2. Place the remaining 4 cups of oats into a blender. Blend until almost powdery, then pour into the large bowl.
  3. Add the salt, brown sugar, powdered milk, and cinnamon into the large bowl.
  4. Mix well until everything is combined.
  5. Measure ½ cup of the oatmeal mixture into each snack-size plastic baggie and seal.
To use DIY Instant Oatmeal Packets:
  1. Pour the packet into a bowl, and add the desired hot water. Stir and serve.
Notes
Because the plastic bag doesn't get wet or dirty, you can reuse it.
You can also add dried fruit, nuts, coconut. 

Sunday, November 30, 2014

SALTED CARAMEL PECAN PIE no CORN SYRUP

NewPecanPie
thespunkycoconut.

Crust:
1 cup of cashews, soaked for 3 hours, rinsed, and strained
1 tablespoon coconut oil or ghee
1 tablespoon honey
1 teaspoon vanilla
1/2 cup shredded coconut
Filling:
packed cup pitted Medjool dates, soaked for 3 hours in 1 cup of water (save the soaking water)
1/4 cup coconut oil or ghee
1 tablespoon vanilla
1/4 teaspoon salt
Fold In: 
2 cups salted roasted pecans, plus more to garnish
HW: Before you begin see my note at bottom for texture of puree. 
1. Set the oven to 400°F.
2. Puree the cashews, oil, honey, and vanilla crust ingredients in a food processor fitted with the S blade for about 1 minute. Add the shredded coconut and puree to form a ball.
3. Using wet hands press the crust into a glass pie dish. Do NOT pre-bake the crust.
4. Add all of the filling ingredients, including the soaking water, to the blender and puree until smooth. Fold in the pecans, then add the filling to the unbaked crust. Garnish the pie with more pecans.
5. Bake for 10 minutes, then reduce the heat to 350°F, and bake for 10 minutes more.
6. Allow to cool on the counter, then refrigerate to set.
Hw: I am not sure if I would use the soak water, you normally soak raw nuts to remove natural toxins. I maybe would just use a little warm water as needed to make the puree. Which she states is more like a crumbly fine mix. 

Thursday, November 6, 2014

Pecan Pie

Paleo Pecan Pie | The Paleo Mom

  1. Preheat oven to 375F.
  2. Combine all ingredients and work together to form a dough with your hands.
  3. Place the dough into a 8″ deep dish or 9″ pie plate.  Channel your inner playdough-loving child, and pat and push the dough to fully line the pie plate (this is a type of pie crust called a push crust, because you “push” it into place rather than rolling it out).  Make a nice edge.
  4. Bake crust for 15 minutes, until starting to turn golden brown.  Remove from the oven.
Ingredients (pie filling):
  1. Preheat oven to 375F.  Toast pecans on a rimmed baking sheet for 5-8 minutes (you can do this while your pie crust is cooking), until fragrant (the pecan pieces take about 5 minutes, and the pecan halves take a little longer).
  2. Once the pecans and pie crust are out of the oven, reduce the heat to 350F.
  3. Heat honey and maple syrup in a small saucepot over medium-high heat until it comes to a rapid simmer.
  4. Meanwhile, beat the eggs and egg yolk together.  Temper the eggs (which means adding a little bit of the very hot honey and syrup to the eggs while you stir them quickly) then add the eggs to honey and remove from the heat.
  5. Stir in the vanilla, salt, and ghee (or other fat of choice), and chopped pecans.  Pour into pie crust.
  6. Arrange pecan halves to cover the top of the pie.  Place pie in the oven and back for 20-25 minutes, until set (you’ll know it’s set when you jiggle the pie a little and the middle doesn’t wobble like jello–how long this takes depends a bit on whether your crust or filling cooled a bit before getting it into the oven and just how hot your honey got when you brought it to a simmer, so it could take as long as 30 minutes).
  7. Let the pie cool completely before serving.  Enjoy!